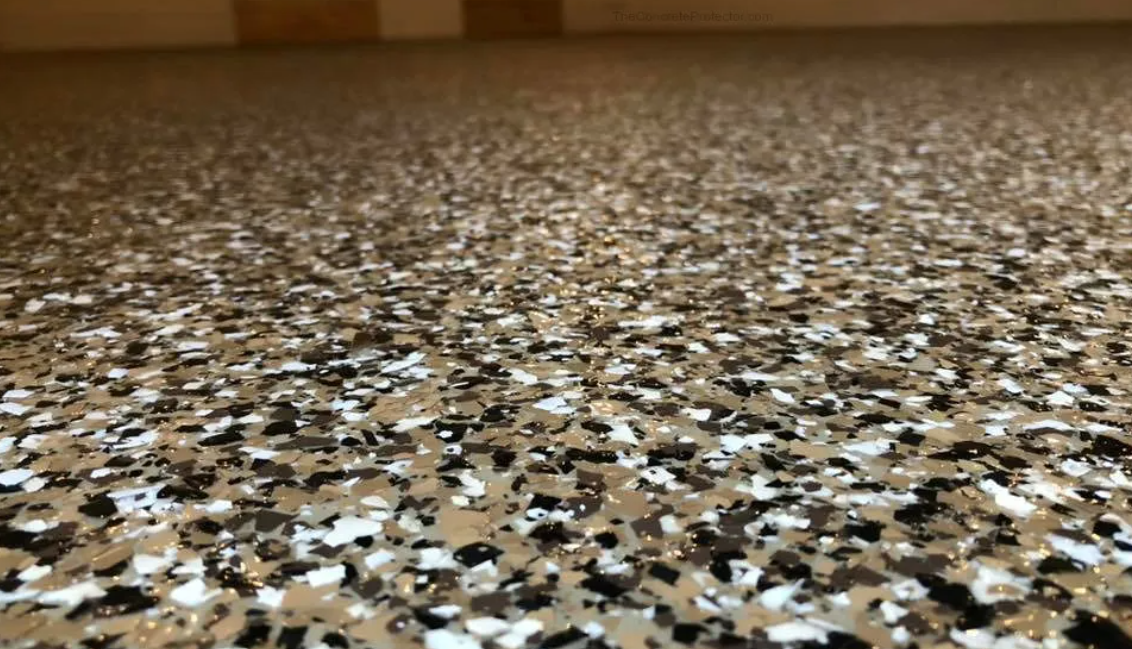
How To Apply Flake To A Garage Floor?

How To Apply Flake To A Garage Floor! Are you tired of looking at your dull and boring garage floor? Adding flakes to your garage floor is a great way to give it a fresh and vibrant look. Flake application enhances the aesthetic appeal and provides durability and protection to the concrete surface. If you’re wondering how to apply flake to a garage floor, this article will guide you through the step-by-step process, ensuring you achieve a beautiful and long-lasting finish. From prepping the surface to choosing suitable materials, let’s dive into the world of flake application for your garage floor.
Table of Contents
ToggleHow To Apply Flake To A Garage Floor: Step-by-Step Guide
Here is a guide on how to apply flake to a garage floor.
Step 1: Prepare the Garage Floor
Before you begin applying flake, it is crucial to properly prepare the garage floor. Start by removing all items, tools, and debris from the floor. Sweep the surface thoroughly to get rid of loose dirt and dust. If there are any oil stains or other contaminants, clean them using a degreaser or an appropriate cleaner. It is essential to have a clean, smooth, and dry surface for the best adhesion of the flake.
Step 2: Repair Cracks and Imperfections
Inspect the garage floor for any cracks or imperfections. If you find any, use a concrete patching compound to fill them in. Follow the manufacturer’s instructions for the patching compound and allow it to dry completely before moving on to the next step.
Step 3: Etch the Floor
To ensure proper flake adhesion, you must etch the garage floor’s surface. Etching creates a rough texture that helps the flake to bond effectively. You can use an etching solution, usually a mix of water and muriatic acid, or a commercial etching product. Follow the manufacturer’s instructions and use protective gear, gloves, and goggles when working with the etching solution. After etching, rinse the floor thoroughly with water and allow it to dry completely.
Step 4: Apply the Primer
Once the floor is dry, apply a coat of primer for flake flooring. The primer helps the flake adhere better and provides a solid base for the flake system. Use a paint roller to apply the primer evenly across the garage floor. Allow the primer to dry according to the manufacturer’s instructions.
Step 5: Apply the Base Coat
After the primer has dried, it’s time to apply the base coat. The base coat is usually a colored epoxy coating that serves as the foundation for the flake system. Pour the base coat on the floor and spread it evenly with a roller or squeegee. Work in small sections to ensure a smooth application. Depending on the product, you might need to apply a second coat. Allow the base coat to cure as per the manufacturer’s instructions.
Step 6: Apply the Flake
Once the base coat is cured, it’s time to apply the flake. Begin by dividing the floor into manageable sections. Take a handful of flake and broadcast it evenly over the wet base coat. You can do this by hand or use a flake broadcast spreader for consistent results. Continue this process until the entire floor is covered with flake. After applying the flake, allow the floor to cure for the specified time.
Step 7: Remove Excess Flake
After the floor has cured, sweep away the excess flake using a stiff bristle broom. This step is essential to ensure that the flake is properly embedded in the base coat and creates a smooth surface.
Step 8: Apply the Topcoat
To seal and protect the flake, apply a clear topcoat. The topcoat is usually a clear epoxy or polyurea coating. Use a roller or squeegee to apply the topcoat evenly. Apply two coats of topcoat for enhanced durability and longevity. Allow the topcoat to cure as per the manufacturer’s instructions.
Step 9: Allow Curing Time
After applying the topcoat, give your newly flaked garage floor ample time to cure and harden. This curing period is crucial to ensure the flake system becomes fully bonded and ready for foot traffic and other use.
Step 10: Enjoy Your Flake Garage Floor
Once the curing time is complete, your flaked garage floor is ready for use. Enjoy your newly transformed garage space with its durable, decorative, and easy-to-clean surface.
Conclusion
In conclusion, applying flake to a garage floor is a cost-effective and visually appealing way to enhance the overall look and functionality of the space. By following the step-by-step process outlined in this article, homeowners can achieve professional results without needing to hire a contractor. It is important to properly prepare the surface, choose high-quality materials, and apply the flake evenly for optimal results. With proper maintenance and care, a flake-coated garage floor can withstand heavy foot traffic and provide long-lasting durability. So why wait? Transform your garage into a beautiful and functional space by applying flake today! If you want to read more guides & information about the floor then click here https://floorshields.com/.


