Epoxy floor coating has become a popular choice for homeowners looking to transform their floors into durable, attractive surfaces. While hiring professionals to install epoxy coating is always an option, many homeowners are opting to take on the task themselves. Installing epoxy floor coating yourself can be a rewarding and cost-effective project, provided you follow the right steps. In this ultimate guide, we will walk you through the process of installing epoxy floor coating, ensuring a successful and long-lasting result.
The Ultimate Guide to Installing Epoxy Floor Coating Yourself
Here’s a step-by-step guide to help you through the process:
Tools and Materials You’ll Need:
- Epoxy floor coating kit (includes epoxy resin and hardener)
- Concrete etching solution
- Broom and dustpan
- Power scrubber or scrub brush
- Pressure washer or hose
- Painter’s tape
- Paint roller and extension pole
- Paint tray
- Spike shoes
- Squeegee or floor broom
- Plastic sheeting or tarps
- Safety goggles
- Respirator mask
- Gloves (chemical-resistant)
- Floor buffer (optional)
- Solvent-based epoxy primer (if recommended by the manufacturer)
Step 1: Prepare the Area
- Clear the floor of any furniture, objects, or debris. Sweep the entire surface thoroughly, followed by using a dustpan to remove loose dirt and dust.
- If the floor has any oil or grease stains, clean them with a suitable degreaser.
- Use a concrete etching solution to etch the floor surface. Follow the instructions on the product carefully and ensure you’re wearing safety goggles, gloves, and a respirator mask. This step helps the epoxy adhere better to the concrete.
Step 2: Rinse and Dry the Floor
- Rinse the floor thoroughly with a pressure washer or hose to remove any residue from the etching solution. Make sure there is no standing water left behind.
- Allow the floor to dry completely. This process may take a few days depending on the temperature and humidity levels. Ensure there is good ventilation during this time.
Step 3: Apply Painter’s Tape
- Use painter’s tape to protect any areas you don’t want to coat, such as walls, baseboards, or thresholds. Ensure the tape is firmly applied to prevent any epoxy seepage.
Step 4: Mix the Epoxy
- Carefully read the instructions provided with your epoxy floor coating kit. Mixing ratios may vary, so follow the manufacturer’s guidelines precisely.
- Pour the epoxy resin and hardener into a clean bucket and mix them thoroughly. Use a drill with a mixing attachment or a stir stick to ensure proper blending.
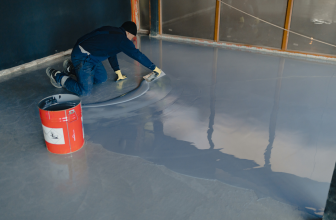
Step 5: Apply the Epoxy
- Start by applying a coat of epoxy along the edges of the floor using a paintbrush.
- Next, pour the mixed epoxy onto the floor in a long, narrow strip.
- Use a paint roller with a medium nap and an extension pole to spread the epoxy evenly across the floor. Work in sections, moving from one side of the room to the other, and slightly overlap each pass to ensure complete coverage.
- If recommended by the manufacturer, use a floor buffer to spread the epoxy and achieve a smooth finish.
- Be mindful of the working time of the epoxy mixture, as it will begin to cure and become unworkable after a certain period. Follow the instructions provided by the manufacturer for the best results.
Step 6: Remove Bubbles and Debris
- Once you’ve applied the epoxy, use a spike roller or a squeegee to remove any bubbles or trapped debris. This step helps to ensure a smooth and even surface.
- Check for any imperfections or bubbles and use a brush or roller to touch up those areas if necessary.
Step 7: Allowing the Epoxy to Cure
After applying the epoxy coating, allow it to cure as per the manufacturer’s instructions. Typically, epoxy takes around 24 to 48 hours to cure completely. During this time, ensure the area is free from foot traffic, dust, or any other contaminants that may mar the surface. Maintain proper ventilation to aid in the curing process.
Step 8: Applying a Topcoat (Optional)
For added protection and durability, applying a topcoat is recommended. The topcoat acts as a sealant, providing an extra layer of protection against abrasion, chemicals, and UV damage. Follow the manufacturer’s instructions for mixing and applying the topcoat, similar to the process of applying the epoxy coating.
Step 9: Maintaining Your Epoxy Floor
Once the epoxy coating has fully cured, it’s important to maintain your newly coated floor properly. Regularly clean the surface using mild detergent and water or an epoxy-specific cleaner. Avoid using harsh chemicals or abrasive cleaners that may damage the coating. Depending on usage and wear, periodic reapplication of a topcoat may be necessary to maintain the protective layer.
Conclusion
In conclusion, installing epoxy floor coating yourself is a cost-effective and rewarding way to enhance the aesthetics and durability of your garage or basement. By following the steps outlined in this ultimate guide, you can achieve a flawless finish that will last for years to come. Remember to properly prepare the surface, choose high-quality materials, and take your time during the application process. With patience and attention to detail, you can transform your concrete floors into a stunning feature of your home. So what are you waiting for? Take the first step towards a beautiful new floor today!